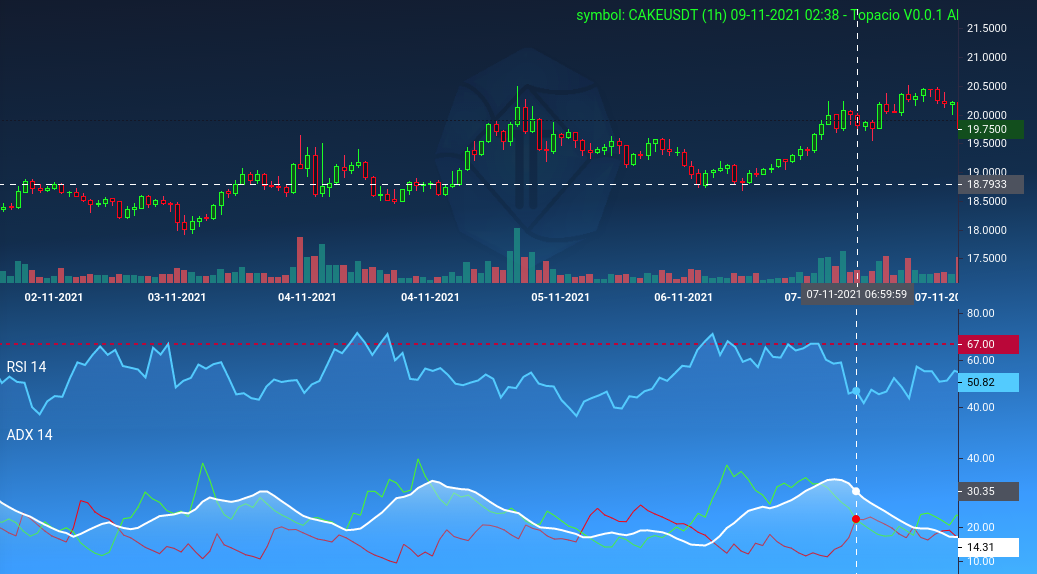
Okay, so I’ve been messing around with Lightweight Charts lately, trying to get a feel for it in a little project I’m working on. Today, I spent some time specifically digging into the crosshair feature, you know, those vertical and horizontal lines that follow your mouse pointer on the chart. Thought I’d share how that went.
Getting Started
First off, I already had a basic chart up and running. Just grabbed the library, set up a simple HTML file, and plotted some dummy price data, like open, high, low, close values. Nothing fancy, just enough to see something on the screen. The chart showed up fine, and by default, it already had a basic crosshair working when I moved my mouse over the chart area.
Looking at the Default Crosshair
The default was okay, just a simple dotted line, gray color I think. But I wanted to see what else I could do with it. Could I make it thicker? Change the color? Maybe make it solid instead of dotted? That kind of stuff. I figured there must be some options somewhere.
Finding the Options
So, I started digging into the documentation and examples. Found out that you control most chart features through an `applyOptions` method on the chart object itself. Inside the options object you pass to it, there’s a `crosshair` property. Bingo! That looked promising.
Inside this `crosshair` object, there were several settings:
mode: This seemed interesting. It had values like ‘Normal’ (the default, I guess) and ‘Magnet’.vertLine: Options specifically for the vertical line.horzLine: Options for the horizontal line.
Playing with the ‘mode’
I first tried changing the mode to ‘Magnet’. Reloaded my page. Whoa, okay. Now the crosshair didn’t just follow my mouse exactly, it sort of snapped to the nearest data point (like the closing price of the candle my mouse was near). That was pretty neat, could be useful for making it easier to pinpoint specific prices on the candles.
Customizing the Lines
Next, I went into the vertLine and horzLine settings. This is where I could really change the look.
Under both vertLine and horzLine, I found similar options:
color: Pretty obvious, changed the line color. I tried setting it to a nice blue.width: Made the line thicker. I bumped it up to 2 pixels.style: This let me change it from dotted. I tried ‘Solid’, ‘Dotted’, ‘Dashed’. I settled on ‘Solid’ for a clearer look.visible: You could actually turn off either the vertical or horizontal line completely by setting this to false. Tried it just to see, turned the vertical one off for a sec.labelVisible: This controlled whether the little price/time labels appeared on the axes where the crosshair lines ended. I left these on.labelBackgroundColor: Even let me change the background color of those labels. Changed it to a dark gray to match my test page’s theme better.
So, I applied these options, something like this in my code:
*({
crosshair: {
mode: *, // Switched back to Normal for now
vertLine: {
color: '#0000FF', // Blue
width: 2,
style: *,
visible: true,
labelVisible: true,
},
horzLine: {
color: '#0000FF', // Blue
width: 2,
style: *,
visible: true,
labelVisible: true,
labelBackgroundColor: '#333333' // Dark gray label bg
}
}
Note: The `*` part, I had to make sure I was using the constants provided by the library itself, not just typing the string "Solid". Caught me out for a second there.
Getting Crosshair Data
I also saw there was a way to track where the crosshair was. The chart object has a `subscribeCrosshairMove` method. I hooked into that just to test.
*(param => {
if (*) {
*(`Crosshair at x: ${*.x}, y: ${*.y}`);
}
if (*) {
*(`Time: ${*}`);
}
// Could also get price from *
Moving my mouse around now printed the coordinates and the timestamp under the cursor to the console. Pretty useful if you want to display detailed info somewhere else on your page based on where the user is pointing.
Final Thoughts
Overall, customizing the crosshair was pretty straightforward once I found the right options block. It's quite flexible, letting you change the appearance (color, thickness, style) and behavior (normal vs magnet mode) easily. Being able to hide parts of it or track its movement adds more power too. So yeah, happy with how that turned out. It lets you match the crosshair look and feel to the rest of your application design quite nicely.


