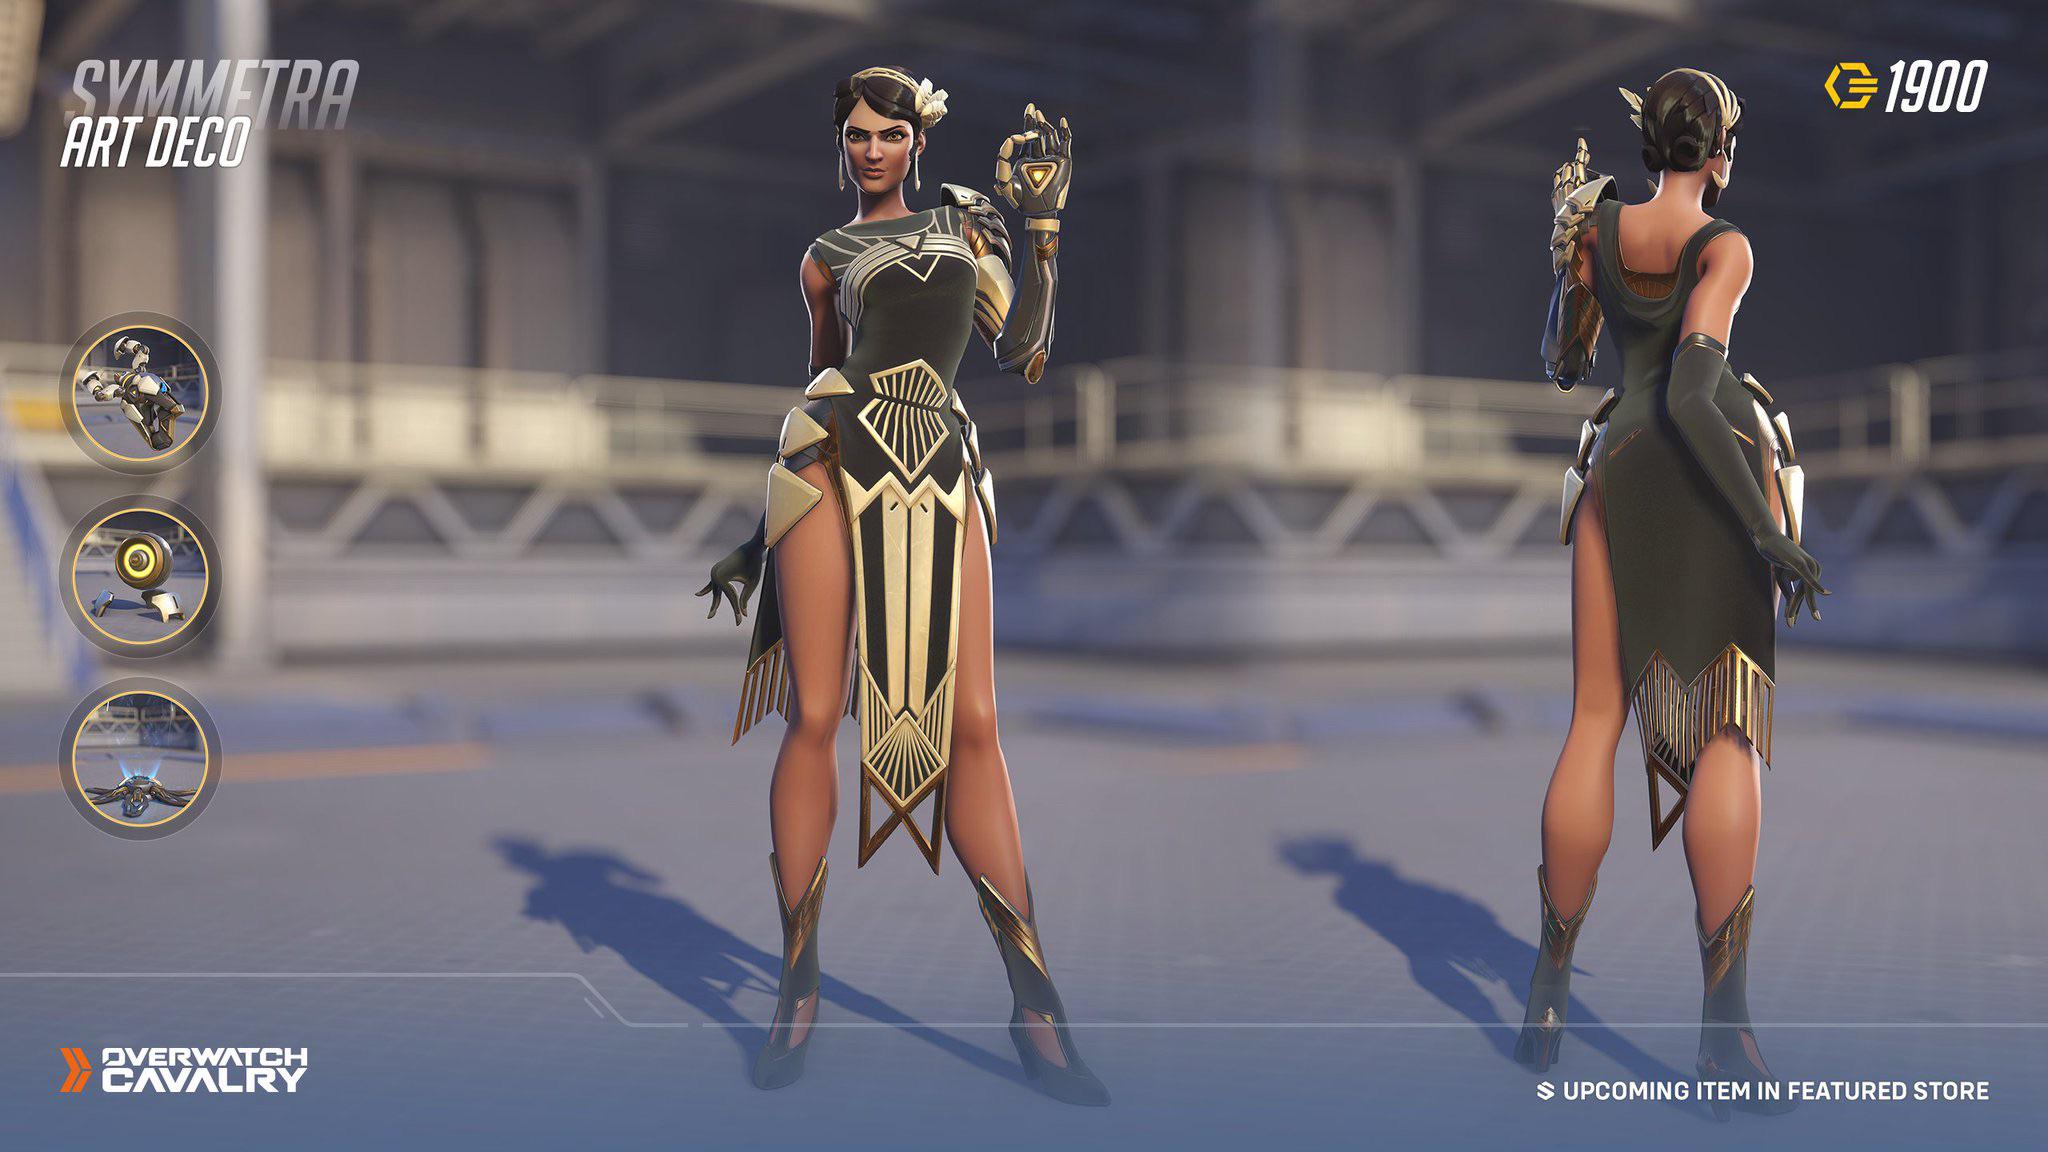
Okay, let me tell you how I got this art deco skin done. It wasn’t exactly planned out like some big project, more like I just got this itch, you know? I wanted something that looked classy, old-school fancy, like something out of the Roaring Twenties but on my screen.
Getting the Vibe Right
First off, I just dove into looking at actual Art Deco stuff. Spent a good chunk of time scrolling through images – buildings, posters, those fancy lamps, cars, everything. I wasn’t trying to copy one specific thing, just absorbing the shapes, the feel. Lots of sharp angles, geometric patterns, those sunburst things, and of course, the gold and black. I saved a bunch of pictures, kinda made a digital scrapbook to keep the mood in front of me.
Figuring Out Where to Put It
I needed a canvas. Thought about a few things, maybe modding a game interface or something. But I settled on skinning a piece of software I use daily. Felt practical, something I’d actually see and appreciate. It had enough buttons and panels that I could really play with the Deco elements.
Sketching Like Mad
Didn’t touch the computer design tools yet. Nope. Pen and paper time. I started doodling layouts, trying to fit those Deco shapes onto the software’s structure. Lots of symmetrical stuff, repeating lines, stepped borders. Tried making icons look like those stylized figures you see in old posters. Filled up several pages with really rough ideas, crossing things out, drawing arrows. It’s messy, but it helps get the bad ideas out fast.
Building the Bones
Alright, then I moved to the digital part. Fired up my usual graphics program. Started blocking out the main areas using the sketches as a very loose guide. Big focus on clean lines. Art Deco needs that precision, I think. So, lots of guides, snapping shapes to grids. Laid down the base colors – mostly deep blacks and very dark grays to make the other stuff pop.
Adding the Bling – The Hard Part
Now for the signature look: the gold and chrome. This took the longest. Just making something yellow doesn’t cut it. I messed around with gradients, shadows, highlights, trying to get that metallic sheen. It’s all about faking the light. Had to create custom textures, subtle noise, things like that to give it depth. Iterated on this a ton. Made some bits look like polished brass, others like brushed steel. You gotta have variety.
- Tried sharp highlights for polished looks.
- Used softer gradients for brushed metal effects.
- Added very thin, dark lines to define edges.
- Played with inner glows to simulate reflection.
Getting this part right was probably 60% of the job. It needs to look rich, not cheap.
Refining and Testing
Once I had a decent draft, I actually applied the skin to the software. Used it for a day or two. This is super important. Stuff always looks different in practice. Some text was hard to read against the fancy backgrounds. Some buttons didn’t feel distinct enough. The metallic effect looked weird on certain elements. So, back to the design file. Tweaked colors, adjusted contrast, resized some elements, simplified others. Went back and forth like this maybe three or four times. Annoying, but necessary.
The Final Polish
Happy with the main look, I went through and polished all the little details. Made sure every line was crisp, every corner sharp where it needed to be. Added tiny bevels to buttons to give them a bit of physicality. Checked that the patterns tiled correctly without obvious seams. It’s the little things that sell the “legendary” part, right? Making sure it feels complete and intentional.

And that’s pretty much it. Took a while, lots of fiddling, but ended up with this Art Deco skin that feels really unique. It wasn’t some magic formula, just looking at references, lots of trial and error, and sticking with it until the metallic bits actually looked metallic. Definitely worth the effort.


